Woohoo! A Pinterest milestone.
Today I hit an equal number of followers and those I follow. What are the chances it happens at the same moment!
Yippeeee! Come follow me on Pinterest.
Showing posts with label Paper Inspiration. Show all posts
Showing posts with label Paper Inspiration. Show all posts
Friday, March 2, 2012


Monday, January 2, 2012
The Card Swap
My BFF lives on the other side of the country. We're both avid crafters and participate in Stampin' Up workshops from time to time. Recently we found out that we both purchased the same paper punch; the pennant punch. We decided it would be so much fun to create a card for one another using the same punch. Then we thought it would be even more fun to keep it going. Each round would have a different theme.
For each round one person picks a tool, craft item, theme, or technique and both of us must create a card for the other using it. Then with a personal message handwritten inside it gets dropped in the mail to surprise the other. Our first round's item was Stampin Up's Pennant Punch.
I made her a colorful strip of pennants.
She made me a turkey. I was tickled to find her in my mailbox.
Next round's item is Chip Board. Yikes! I've never really used chip board before so I guess I'll be learning something new.
What fun!
For each round one person picks a tool, craft item, theme, or technique and both of us must create a card for the other using it. Then with a personal message handwritten inside it gets dropped in the mail to surprise the other. Our first round's item was Stampin Up's Pennant Punch.
I made her a colorful strip of pennants.
She made me a turkey. I was tickled to find her in my mailbox.
Next round's item is Chip Board. Yikes! I've never really used chip board before so I guess I'll be learning something new.
What fun!
Saturday, July 2, 2011
Good Deal
I LOVE it when you purchase a craft item or something that was on sale or was a good bargain. Perhaps at the time you don't have any idea what you're going to do with it but you know that someday it will come in handy.
This is what happened with these Father's Day cards.
![]()
One day while browsing The Paper Source store I paused in front of the clearance rack. It wasn't much past Christmas time so they had a lot of holiday items. If you know The Paper Source it is dream land to girlie girls who love everything paper. They sell beautiful stationary, special event, unique paper goods, some of which you can design yourself. But, because they sell such beautiful things they're prices are a bit of an investment. But, if your'e lucky you might find something you need on the clearance rack.
This is what happened with these Father's Day cards.

One day while browsing The Paper Source store I paused in front of the clearance rack. It wasn't much past Christmas time so they had a lot of holiday items. If you know The Paper Source it is dream land to girlie girls who love everything paper. They sell beautiful stationary, special event, unique paper goods, some of which you can design yourself. But, because they sell such beautiful things they're prices are a bit of an investment. But, if your'e lucky you might find something you need on the clearance rack.
And, there they were. Plain stickers in circle and rectangular shapes. I have no idea why I would need these stickers but I had this hunch that someday I might need them for envelope seals or invitations or cards or something.
More than half a year late as I brainstormed father's day cards I remembered these delightful stickeres. And, I remembered the little letter stamps that I had also bought one sale, many moons ago. The letter stamps were also one of those items where I thought "I know I can use these" but because they are individual letters and trying to line them up in a straight line to stamp out a word was just more than I wanted to deal with. But, one letter at a time, that's more my style.
Voila! Stamped stickers to spell out brother or dad. I LOVE IT! My investment in these sale items have totally paid off.
Can't wait to make more cards with these stickers and stamps
Sunday, November 14, 2010
Organizing Acrylic Stamps
One of my favorite things to do is to find a new use for something I already own. It excites me! (Hmmm... is it a sign that I need a life? Nah. Just means I find joy in the simple things of life.)
I heard about this idea on someone's blog or website eons ago and have been wanting to do this for ages. Finally, I have. This is a safe way to store and organize your acrylic stamps.
-Tombo (or any rolling dry adhesive used for paper crafts)
-Dry White Out (the kind that rolls)
-Pen
Putting it together:
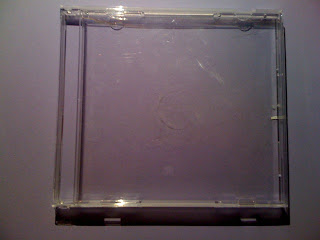
You'll need an empty old CD jewel case. Recycle. Be green!


On the printed side of your acrylic stamps packaging, cut to fit the jewel case. You will use it as a cover label.

Use your dry adhesive roller to place clear adhesive to the front of your label. I personally love Tombow adhesive.

Place the label on the inside of the cover. When you close the case, you will see the labels right side up.
(apologies for the side view in this photo)


I heard about this idea on someone's blog or website eons ago and have been wanting to do this for ages. Finally, I have. This is a safe way to store and organize your acrylic stamps.
Tools:
- Old CD jewel cases-Tombo (or any rolling dry adhesive used for paper crafts)
-Dry White Out (the kind that rolls)
-Pen
Putting it together:
You'll need an empty old CD jewel case. Recycle. Be green!

Your packaged acrylic stamps.

Peel off the stamps, one by one.

Arrange them on the inside of the jewel case.
On the printed side of your acrylic stamps packaging, cut to fit the jewel case. You will use it as a cover label.
Use your dry adhesive roller to place clear adhesive to the front of your label. I personally love Tombow adhesive.

Place the label on the inside of the cover. When you close the case, you will see the labels right side up.
(apologies for the side view in this photo)

To give you a base to label the case, I used a Papermate dry white out and ran it across the edge. It makes it easier to see your label when you store it.

Write on the label.

Ready to store. My craft desk (transformed from an IKEA office desk) has a CD holder area. You can use a CD box or any other method you prefer to store your new acrylic stamp cases.

Tip:
Rolling the white out on the edge of the case was a little tricky because there isn't much width to work on. Roll slowly so as not to cut into the white out tape. "Eat Your Yummy Cupcake" was the first one I did. Not so pretty, I think. I got better with practice.
How do you store your acrylic stamps (or even regular wood based rubber stamps, I'd love to hear your ideas)?

Thursday, November 4, 2010
What's Inspiring Me Now?
I feel like I'm constantly being inspired by everyday things, whether it be people, things I hear or see, something I smell, a hug, a thank you. It's all about the moment. Unfortunately, I think of how I'm inspired at that moment but by the time I get home and want to capture it in a card or a photograph or in writing I've either forgotten or the subject is no longer at my finger tips. Don't you ever wish you could have a hard drive that connects to your brain so you could download and save for later?
At the moment, I'm inspired by the women in my small groups. I belong to two and everytime I meet with them I am refueled with hope, reminded how amazing God's love is for us. Its the way they live out God in their lives that inspires me. I feel His love in the growing relationships with these women, empowered to get deeper in faith and to know Jesus more. This is my praise for this week.
Thank you, Lord, for planting these new women friends into my life. These small groups have been an answer to prayer! Amen.
I can't wait to see how this might inspire my art.
At the moment, I'm inspired by the women in my small groups. I belong to two and everytime I meet with them I am refueled with hope, reminded how amazing God's love is for us. Its the way they live out God in their lives that inspires me. I feel His love in the growing relationships with these women, empowered to get deeper in faith and to know Jesus more. This is my praise for this week.
Thank you, Lord, for planting these new women friends into my life. These small groups have been an answer to prayer! Amen.
I can't wait to see how this might inspire my art.
Saturday, September 11, 2010
Organize This: Paper
Whether you say paper, papier, 紙, papel, ペーパー, бумага, carta, or έγγραφο it's all pretty magnificent!
I love paper; colored, patterned, textured, large, small, smooth, silky, shiny, die-cut, hard, soft, for wrapping or writing, cardstock or tissue, it doesn't matter. I love it all!
The appreciation for paper goes way back into my childhood. Stationary, stickers, or pretty bags (plastic or paper) fascinated me. Even paper flowers or paper folding were interesting. I suppose its the versatility in paper that I find delightful. So, as I work with paper to create cards or scrapbooks or other crafts, it only makes sense that I also care for them and keep them organized.
Originally, I organized my 12x12 papers in a plastic stackable drawer. As my supply grew it became difficult to close the drawer without tearing some of the papers. So, I had to come up with another idea. (I've since repurposed the drawer for other uses.)

Next, I moved my papers into a bin that could slide onto a shelf but the only bin I had was a large fabric one that is held up with a wire frame. It's a fabulous bin but for paper, it didn't work. The fabric sagged at the bottom and when I tried to slide it on the shelf the bottom would catch and I would get frustrated because all that paper gets heavy, making it difficult to move around. Leaving it off the shelf only added to the "organized mess" in my room.

Solution! I went to IKEA and I got the Alex Drawer Unit With Caster Wheels. I decided not to put the wheels on it but it sits super cute in my room. I think this is the best solution for my papers right now. Flat drawers that fit the 12x12 paper size. The only thing is the width is less than 24" inside the drawers so you can't quite get two sets of papers in there side by side. But, that's ok, if you stack them slightly you can get everything in there. Isn't it cute? If you've never bought furniture from IKEA before, they're fabulous. Easy instructions and the kits come with everything you need. Tools are pretty basic.


I always feel like Wonder Woman after I've put an IKEA piece together. I am woman hear me roar!Booyah!
I love paper; colored, patterned, textured, large, small, smooth, silky, shiny, die-cut, hard, soft, for wrapping or writing, cardstock or tissue, it doesn't matter. I love it all!
The appreciation for paper goes way back into my childhood. Stationary, stickers, or pretty bags (plastic or paper) fascinated me. Even paper flowers or paper folding were interesting. I suppose its the versatility in paper that I find delightful. So, as I work with paper to create cards or scrapbooks or other crafts, it only makes sense that I also care for them and keep them organized.
Originally, I organized my 12x12 papers in a plastic stackable drawer. As my supply grew it became difficult to close the drawer without tearing some of the papers. So, I had to come up with another idea. (I've since repurposed the drawer for other uses.)

Next, I moved my papers into a bin that could slide onto a shelf but the only bin I had was a large fabric one that is held up with a wire frame. It's a fabulous bin but for paper, it didn't work. The fabric sagged at the bottom and when I tried to slide it on the shelf the bottom would catch and I would get frustrated because all that paper gets heavy, making it difficult to move around. Leaving it off the shelf only added to the "organized mess" in my room.

Solution! I went to IKEA and I got the Alex Drawer Unit With Caster Wheels. I decided not to put the wheels on it but it sits super cute in my room. I think this is the best solution for my papers right now. Flat drawers that fit the 12x12 paper size. The only thing is the width is less than 24" inside the drawers so you can't quite get two sets of papers in there side by side. But, that's ok, if you stack them slightly you can get everything in there. Isn't it cute? If you've never bought furniture from IKEA before, they're fabulous. Easy instructions and the kits come with everything you need. Tools are pretty basic.


I always feel like Wonder Woman after I've put an IKEA piece together. I am woman hear me roar!Booyah!
Sunday, August 8, 2010
Scrapbook Expo
I attended my first Scrapbook Expo yesterday in Santa Clara. No classes for me (limited time on this day) but I made it to the Expo where all the vendors were.
Highlights:
1. I loved seeing all the supplies under one roof (a fabulous break from shop jumping like usual).
2. It's overwhelming and budgeting the amount you want to spend there would be extremely important. List out what you need before you go and stick to it as close as you can. There is a lot of diversion and distraction!
3. Forget the floor map and just start walking (unless of course you are looking for a specific vendor).
4. For many vendors, prices were not any cheaper than online or in the stores. HOWEVER, there seemed to be quite a few $1 type booths. The most shocking being the vendor that advertised 20 items for $1. No kidding! It was run by two guys and housed bins of random punches, stickers, eyelets, paper. Ever seen that episode of Sex & The City where Samantha and Carrie buy purses out of that guys trunk? Same idea but with crafty stuff. That said, I got a WHOLE LOT of stuff for $1. Yeehaw!
5. Two booths inspired me.
Booth One:


It doesn't take much to make me say "oooh!". These ribbons were delightfully stored in little plastic cups by color. They came in different styles, textures, patterns, material, and shape. Couldn't help but pick out a few!
Booth two:
This booth is new to the show which also makes me think that maybe they were new to the industry as well. But, I could be wrong. Their main focus was on acrylic stamps and the ones they displayed were lovely. Simple designs that said a lot. These two cards inspired me. Mostly for their simplicity but also because the tools that I have could make these cards easily.
This booth is new to the show which also makes me think that maybe they were new to the industry as well. But, I could be wrong. Their main focus was on acrylic stamps and the ones they displayed were lovely. Simple designs that said a lot. These two cards inspired me. Mostly for their simplicity but also because the tools that I have could make these cards easily.


I definitely had a great time but would highly recommend budgeting carefully and doing circle around of the expo area so as not to put yourself in debt.
Subscribe to:
Posts (Atom)